How to Paint Kitchen Cabinets for a Flawless, Factory-Like Finish
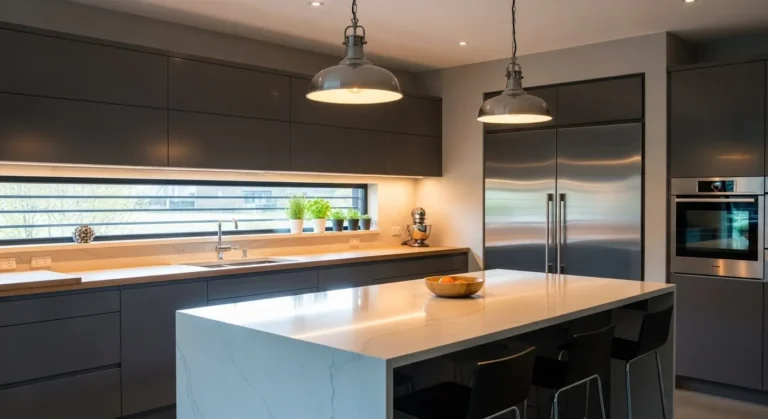
A stunning, factory-smooth cabinet finish is one of the most transformative upgrades you can give your kitchen without blowing your budget. The best part? You can achieve that silky, professional look at home with patience, the right tools, and the right steps. Before you pick up a brush, let’s paint a visual picture of what we’re aiming for.
A factory-like finish isn’t magic, it’s method. This guide walks you through each step in a friendly, practical way so you feel confident (and excited) to makeover your cabinets.
Choose the Right Paint and Supplies
A flawless finish starts long before the first stroke of paint. The products you choose dramatically affect the final look.
Paint Options That Give a Smooth, Professional Look
- Acrylic enamel paints: Self-leveling, durable, and easy to work with.
- Alkyd-based paints (waterborne alkyds): Mimic oil paint smoothness with faster drying and lower fumes.
- Cabinet-specific paints: Designed for adhesion and long-term wear.
Tools to Get the Best Finish
- A high-quality 2–2.5″ angled brush (nylon/polyester)
- Foam roller for smooth surfaces
- HVLP sprayer (optional, but gives the most factory-like finish)
- Sandpaper: 120, 180, and 220 grit
- Tack cloth
- Degreaser
- Wood filler (if repairing scratches)
- Primer: Shellac or bonding primer

Prep Like a Pro: The Secret to a Factory Finish
If the paint is the star, the prep is the entire production crew. Skipping prep steps is the #1 reason for streaks, peeling, and bumpy finishes.
Step 1: Remove Doors and Hardware
Label everything as you go:
- Use painter’s tape to mark hinges and screws.
- Place hardware in zip bags so nothing disappears.
Step 2: Deep Clean and Degrease
Kitchen cabinets collect cooking oils and fingerprints that prevent paint from sticking.
Use:
- A degreaser
- Hot water
- A microfiber cloth
Make sure every inch is clean—including corners and trim.
Step 3: Sand the Surfaces
This is what creates a “tooth” for paint to grip.
- Sand lightly with 120 grit
- Wipe with a tack cloth
- Repeat if the cabinets are glossy
Step 4: Fill Gaps and Imperfections
Factory finishes have zero visible flaws.
Use wood filler to:
- Smooth dents
- Fill deep grain (oak cabinets benefit most)
- Hide scratches
Let dry completely, then sand again with 180–220 grit.

Prime for Perfection
Primer evens out the surface and ensures your paint lasts for years.
Why Primer Matters
- Blocks stains
- Helps paint adhere
- Reduces the number of top coats you’ll need
Choosing the Right Primer
- Shellac-based primer → ultimate stain blocker, dries fast
- Bonding primer → best for slick or laminate cabinets
- Oil-based primer → great for durability, longer drying time
Applying Primer
You can use a brush, foam roller, or sprayer:
- Apply thin, even coats
- Avoid drips on edges
- Let dry completely
- Sand lightly with 220 grit
- Wipe with a tack cloth
Prepping between coats is the difference between “DIY” and “factory.”
Paint for a Factory-Like Finish
Here’s where it gets exciting, the color starts coming to life.
Should You Spray or Roll?
Spray:
- Truly flawless, glass-smooth finish
- Requires ventilation and setup space
Foam roller + angled brush:
- Amazing results when done correctly
- Work in thin layers for a leveling effect
How to Apply Your Paint
Use thin coats—this matters more than how many coats you apply.
- Start with the back of the doors.
- Use long, smooth strokes.
- Avoid over-brushing.
- Let each coat dry fully before the next.
- Lightly sand between coats with 220 grit.
Expect:
- 2–3 coats of paint
- Optional protective top coat (satin or semi-gloss recommended)

Reassemble and Enjoy the Transformation
After the final coat has cured (usually 24–48 hours to handle, 7–30 days for full cure), it’s time to put everything back together.
Tips for Reinstalling
- Handle doors gently—fresh paint is fragile.
- Use felt bumpers to prevent chipping.
- Adjust hinges so everything sits evenly.
Take a moment to appreciate how different your kitchen feels. Fresh paint can make outdated cabinets look brand-new.
Extra Tips for a Professional Result
Want to push the finish from “great” to “jaw-dropping”? Try these:
- Tint your primer close to your paint color.
- Use paint conditioners (like Floetrol for acrylics or Penetrol for oils) for smoother leveling.
- Work in a dust-free space even small particles can ruin the finish.
- Let doors cure flat as long as possible.
- Choose the right sheen: Satin looks luxe and hides flaws; semi-gloss is more durable.

Final Takeaway
Painting kitchen cabinets isn’t just a weekend project, it’s a full-on transformation that requires patience, prep, and precision. But when done right? You’ll have a factory-like finish that looks professionally installed and elevates your entire kitchen.


